Hey there! I’m a supplier of silicone sealing strips, and I’m stoked to share with you how to install these nifty little things. Whether you’re a DIY enthusiast or a professional contractor, getting the installation right is key to making sure your silicone sealing strip does its job effectively. Silicone Sealing Strip
Why Use Silicone Sealing Strips?
Before we dive into the installation process, let’s talk a bit about why silicone sealing strips are so awesome. Silicone is a super versatile material. It’s weather – resistant, which means it can stand up to rain, snow, and extreme temperatures. It’s also flexible, so it can conform to different shapes and sizes. And it’s got great sealing properties, keeping out dust, water, and even some noise. Whether you’re sealing doors, windows, or industrial equipment, silicone sealing strips are a top – notch choice.
Tools and Materials You’ll Need
First off, you gotta gather your tools and materials. Here’s what you’ll typically need:
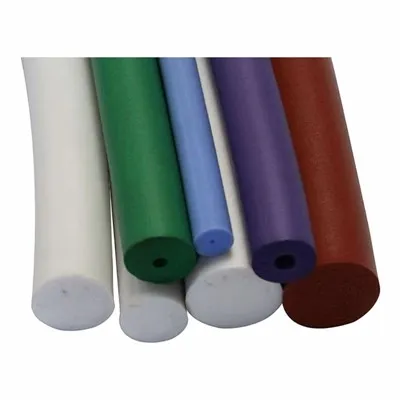
- Silicone sealing strip: Of course, you need the star of the show. Make sure you measure the area you want to seal accurately and cut the strip to the right length. You can use a sharp utility knife or scissors for this.
- Cleaning supplies: You’ll want to clean the surface where you’re going to install the strip. A mild detergent and a clean cloth work well. This ensures good adhesion.
- Primer (optional): In some cases, using a primer can help the silicone strip stick better, especially on certain surfaces like metal or plastic.
- Adhesive (if required): Some silicone strips come with self – adhesive backing, but if yours doesn’t, you’ll need an appropriate adhesive. Make sure it’s compatible with silicone.
Step – by – Step Installation Process
Step 1: Prepare the Surface
The first step is to clean the surface thoroughly. Use your mild detergent and cloth to wipe away any dirt, dust, or grease. If there are any old sealant residues, you might need to use a scraper to remove them. Once the surface is clean, let it dry completely. This might take a little while, so be patient. If you’re using a primer, apply it according to the manufacturer’s instructions and let it dry as well.
Step 2: Measure and Cut the Sealing Strip
Take your measuring tape and measure the length of the area you want to seal. Add a little extra length (about an inch or so) to make sure you have enough to cover the whole area. Then, use your utility knife or scissors to cut the silicone sealing strip to the right length. Be careful when cutting, as you want a clean, straight cut.
Step 3: Install the Sealing Strip
If your silicone strip has a self – adhesive backing, peel off the protective paper. Start at one end of the area you’re sealing and press the strip firmly onto the surface. Make sure it’s aligned properly. As you go along, smooth out any air bubbles or wrinkles. If you’re using an adhesive, apply it to the surface or the back of the strip (depending on the type of adhesive). Then, carefully place the strip on the surface and press it down firmly.
Step 4: Trim the Excess
Once you’ve installed the strip, you might have some excess material at the ends. Use your utility knife to trim it off neatly. Make sure the edges are flush with the surface.
Step 5: Check for a Good Seal
After installation, give the area a quick check. Make sure the strip is firmly attached and there are no gaps. You can run your finger along the strip to feel for any unevenness. If you find any areas that aren’t sealed properly, you might need to re – press the strip or add a little more adhesive.
Tips for a Successful Installation
- Work in a clean environment: Dirt and dust can affect the adhesion of the strip. So, try to work in a clean area.
- Take your time: Rushing the installation can lead to mistakes. Make sure you measure accurately and apply the strip carefully.
- Test the seal: After installation, you can do a simple test. For example, if it’s a window seal, you can spray some water on the outside and check for any leaks on the inside.
Common Installation Mistakes to Avoid
- Not cleaning the surface properly: If the surface isn’t clean, the strip won’t stick well.
- Cutting the strip too short: Always measure twice and cut once. You don’t want to end up with a strip that’s too short to cover the area.
- Not pressing the strip firmly enough: If the strip isn’t pressed down firmly, it might not form a good seal.
Conclusion
Installing a silicone sealing strip isn’t rocket science, but it does require a bit of attention to detail. By following these steps and tips, you can ensure a successful installation. And if you’re in the market for high – quality silicone sealing strips, I’m here to help. Whether you need strips for a small home project or a large industrial application, I’ve got you covered.
Silicone Pad If you’re interested in purchasing silicone sealing strips or have any questions about installation, feel free to reach out. We can discuss your specific needs and find the perfect solution for you. Let’s get your sealing project off to a great start!
References
- Silicone Sealing Strip Product Manuals
- Industry Best Practices for Sealing Strip Installation
Dongguan Hengyue New Material Technology Co., Ltd.
As one of the most professional silicone sealing strip manufacturers and suppliers in China, we also support customized service. We warmly welcome you to wholesale bulk cheap silicone sealing strip from our factory. If you have any enquiry about quotation and free sample, please feel free to email us.
Address: Building 2, No. 3, Yindou Third Road, Qingxi Town, Dongguan City, Guangdong Province
E-mail: dghengyue@126.com
WebSite: https://www.hengyuesilicone.com/